Planner
In this tab you can plan mailings on specific dates. You can use the service for birthday greetings, congratulations on all kinds of holidays, various promotions, quizzes, bonus programs. To do this, you only need to correct the data in your address book.
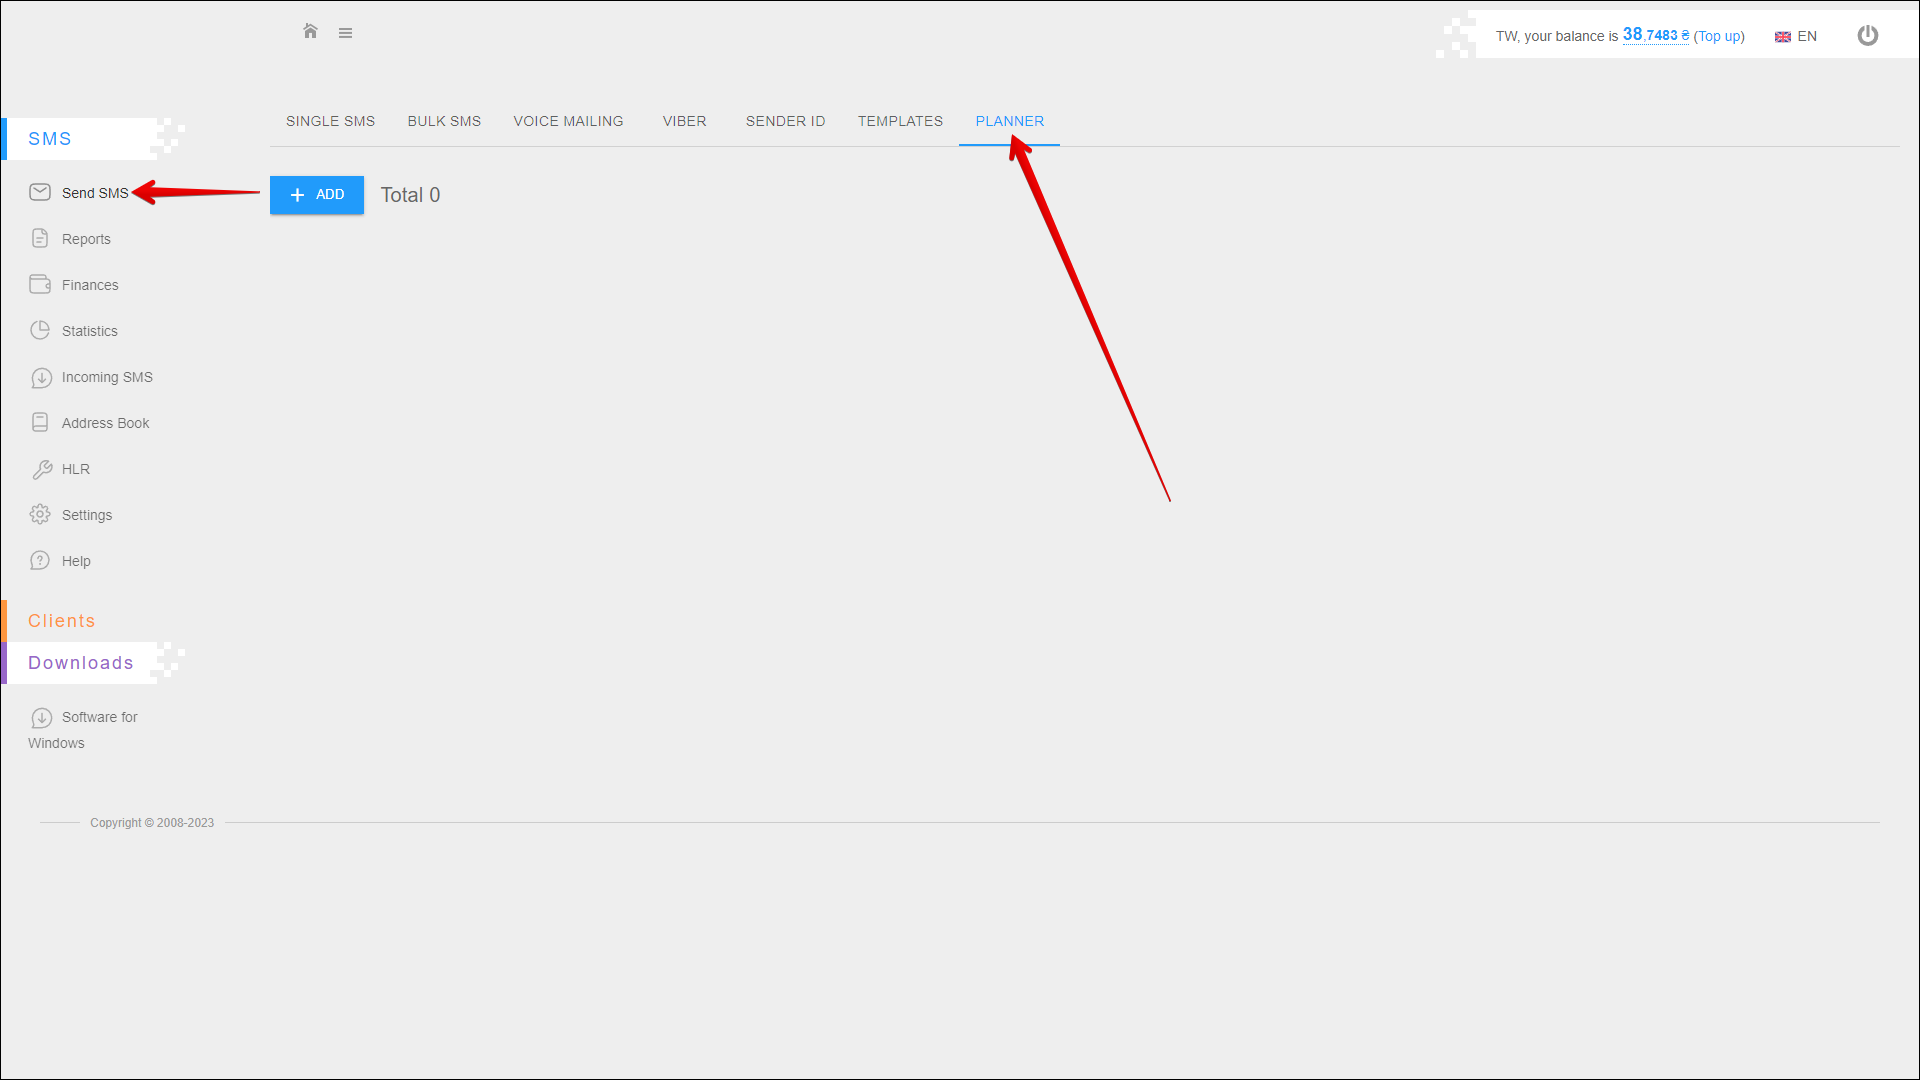
To open this tab, select SMS → Send SMS in the side menu and select PLANNER tab.
Adding a planned mailing
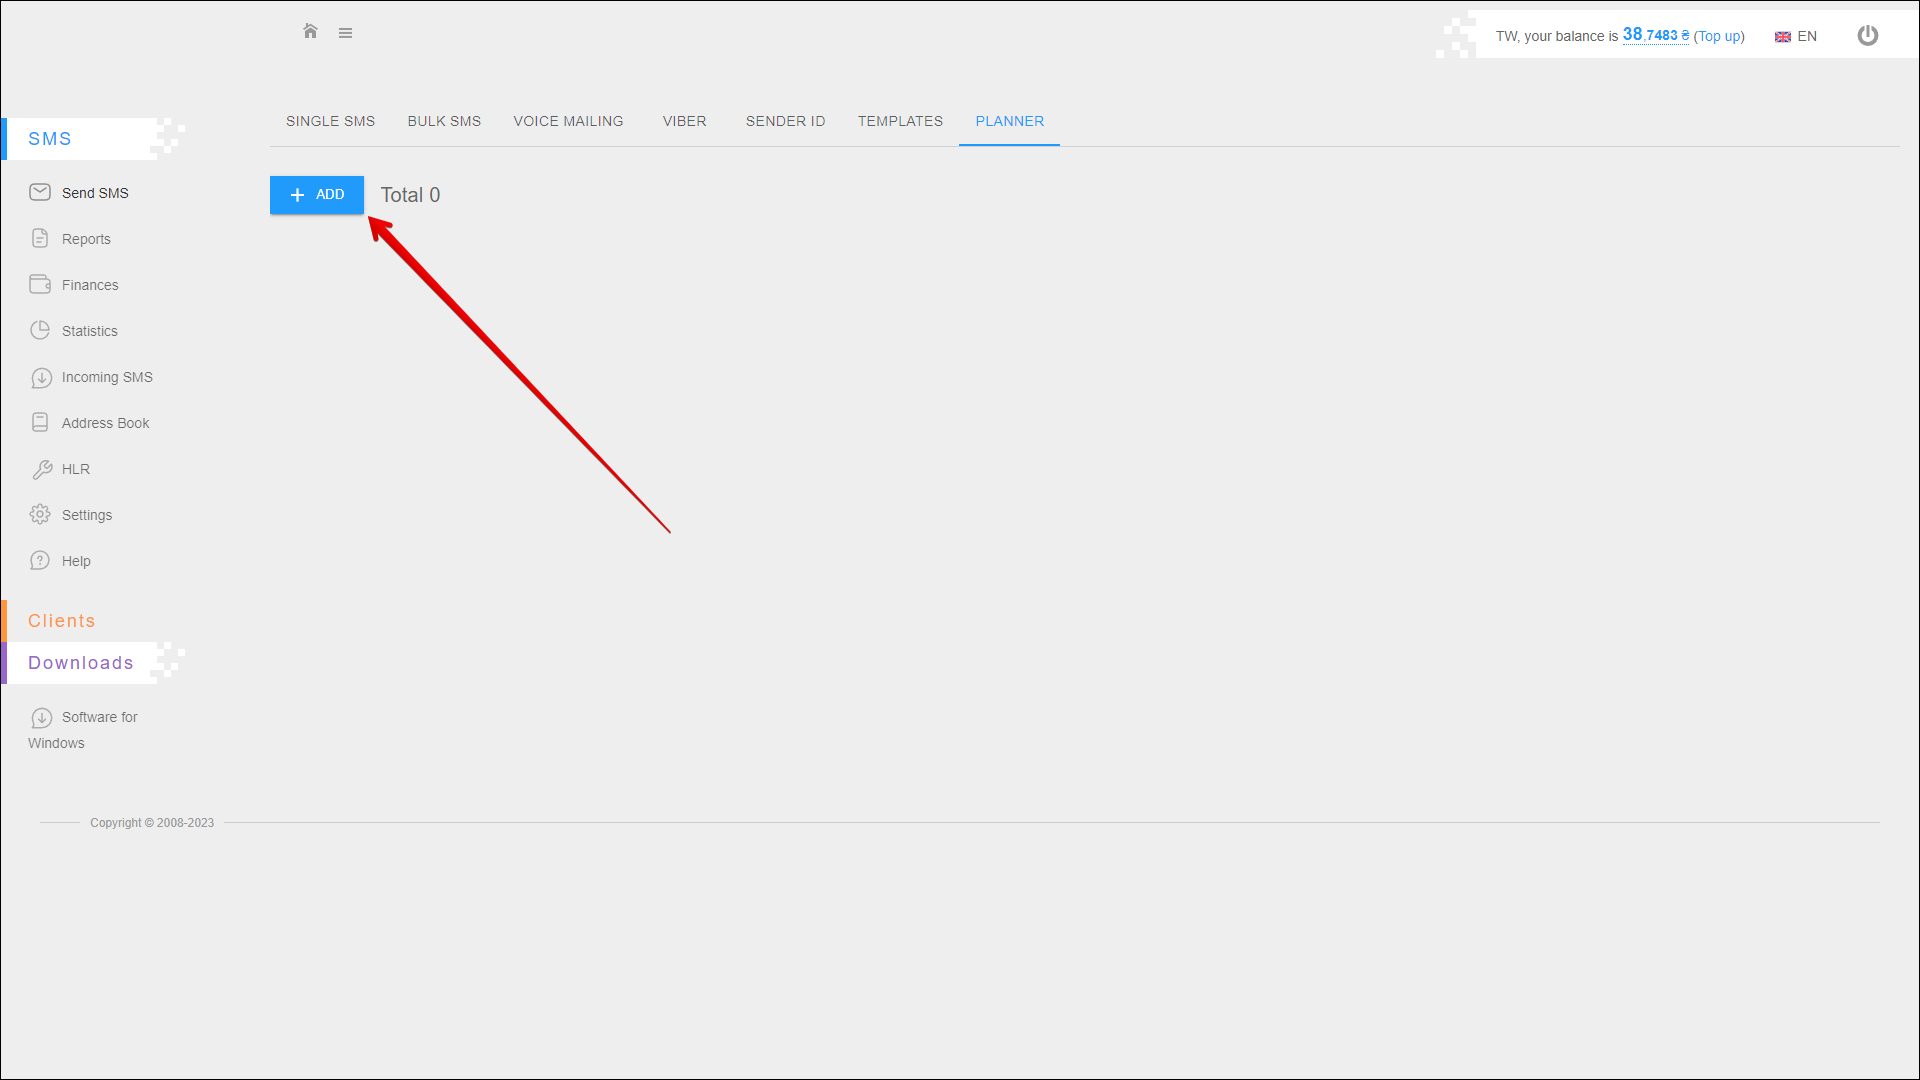
To add a planned mailing, click the + ADD button in the upper left corner of the page.
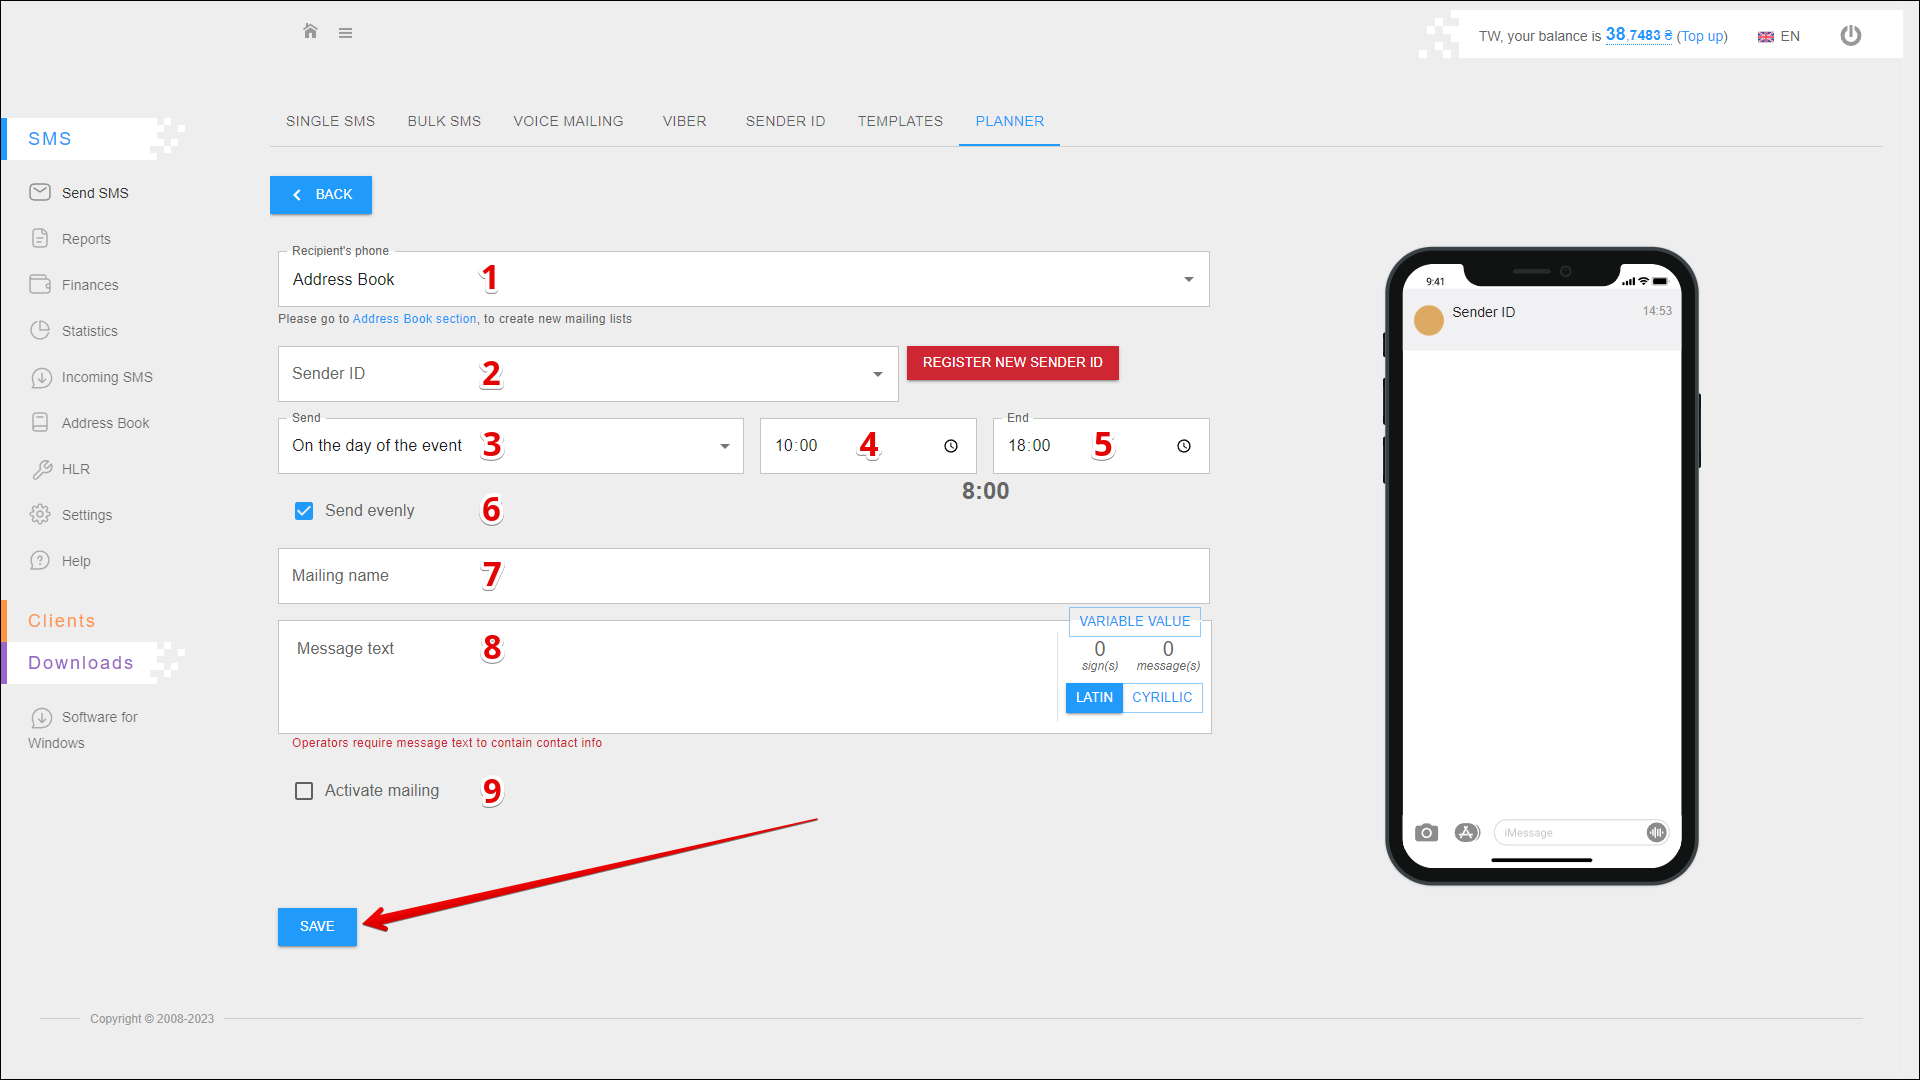
Follow the steps below:
| № | Action |
|---|---|
| 1 | Select recipients' phone numbers from previously added address books To create an address book and add recipient numbers to it, go to RECIPIENTS tab in the Address Book section |
| 2 | Enter the Sender ID or select from a list of previously added Sender IDs. Click the Sender ID field to open that list You can also register a new Sender ID by clicking the REGISTER NEW SENDER ID button to the right of the Sender ID field. You will be redirected to the SENDER ID tab |
| 3 | Select when to send the message: on the day of the event or 1 to 14 days before the event. The date of the event is selected from the address book |
| 4 | Specify the time to send the message. You can enter the time manually or select from the list by pressing the Clock icon on the right side of the field (be sure to specify Kyiv time) |
| 5 | Specify the interval end time for even sms mailing. You can enter the time manually or select from the list by pressing the Clock icon on the right side of the field (be sure to specify Kyiv time). To enable evenly sms mailing, select the Send evenly checkbox. |
| 6 | Check the Send evenly checkbox to enable evenly SMS mailing. With even mailing, messages will be sent evenly over the time interval you select |
| 7 | Enter the mailing name to help you easily navigate through the reports in the future |
| 8 | Enter the message text (sign limits per message: 70 for cyrillic and 160 for latin) Use the VARIABLE VALUE button to add a variable to the message text The right side of the message text input field shows the number of entered signs and the number of messages required to send the entered text You can also switch the message text from cyrillic to latin and vice versa using the LATIN/CYRILLIC selector |
| 9 | Check the Activate mailing checkbox to activate mailing |
Press SAVE to create a planned mailing. The new mailing will be displayed in the table.
Planned mailing list
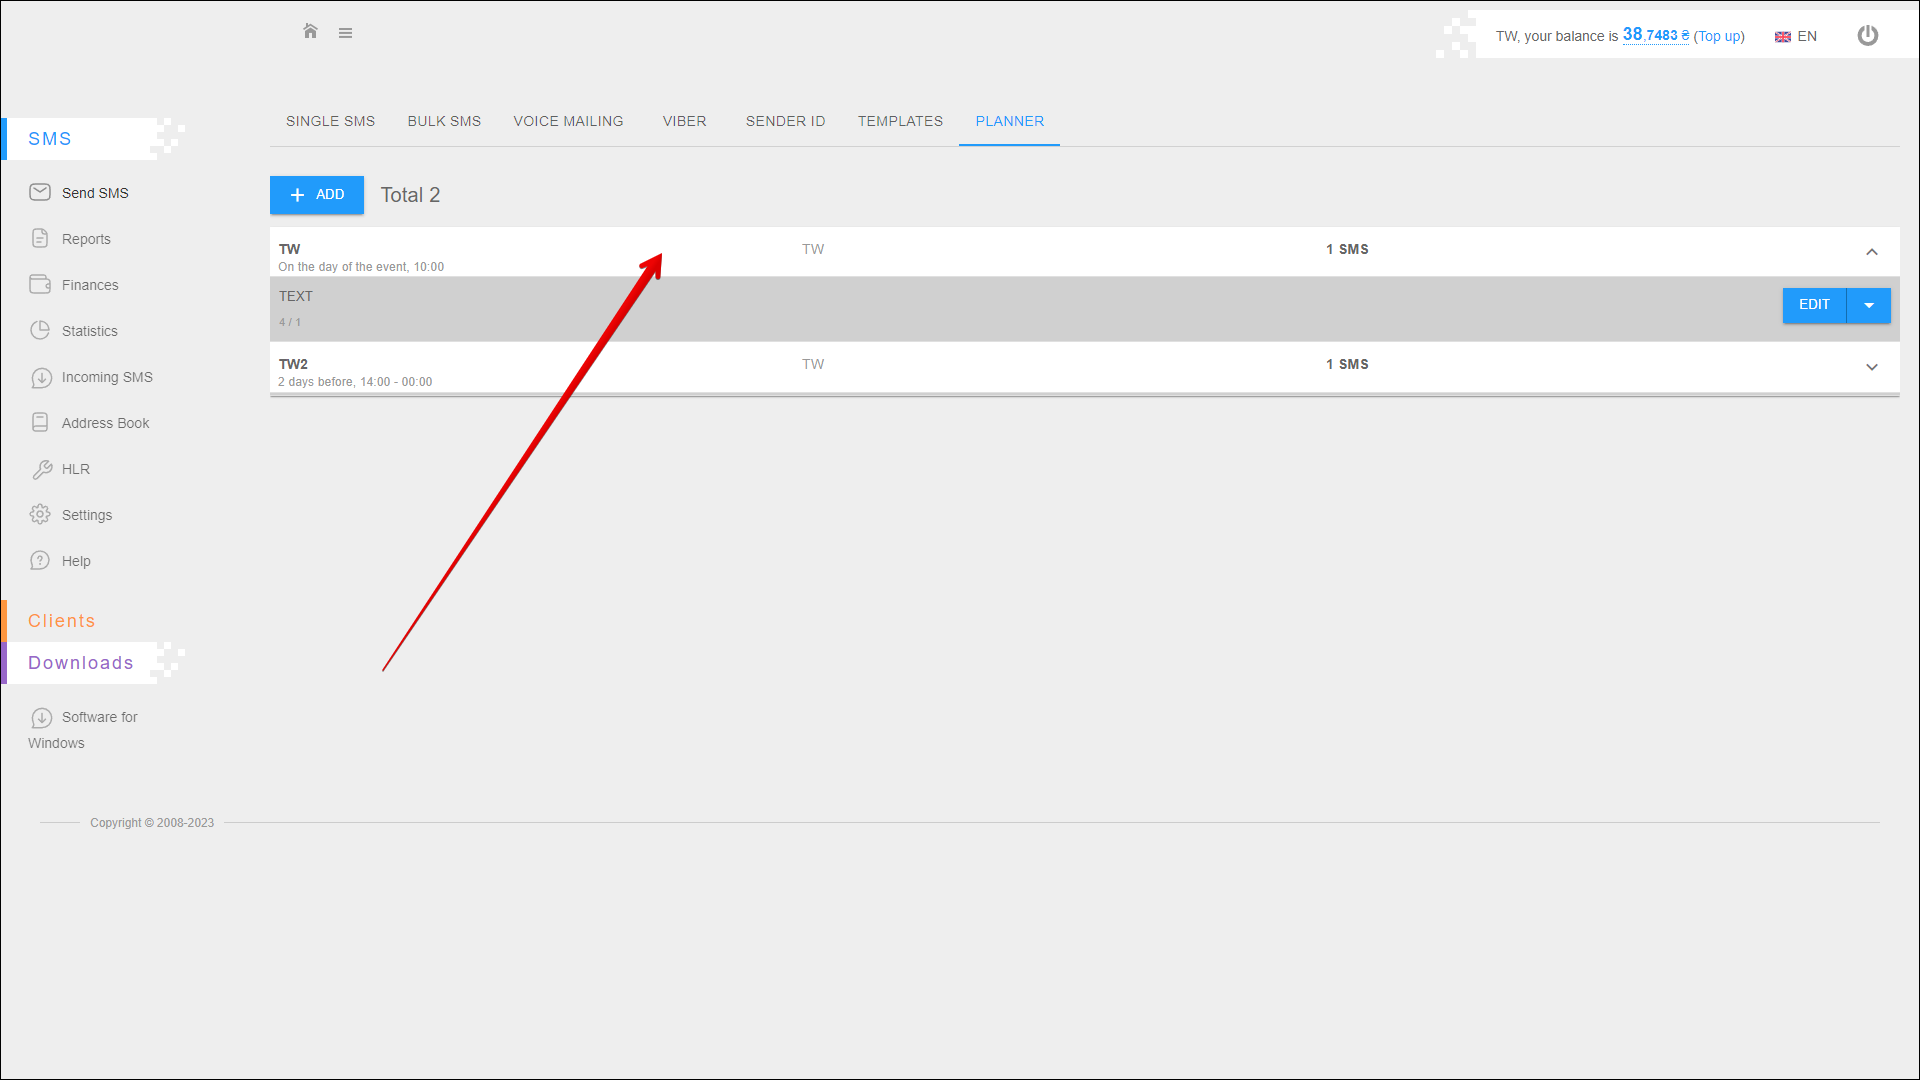
All added planned mailings are displayed in the table on the PLANNER tab.
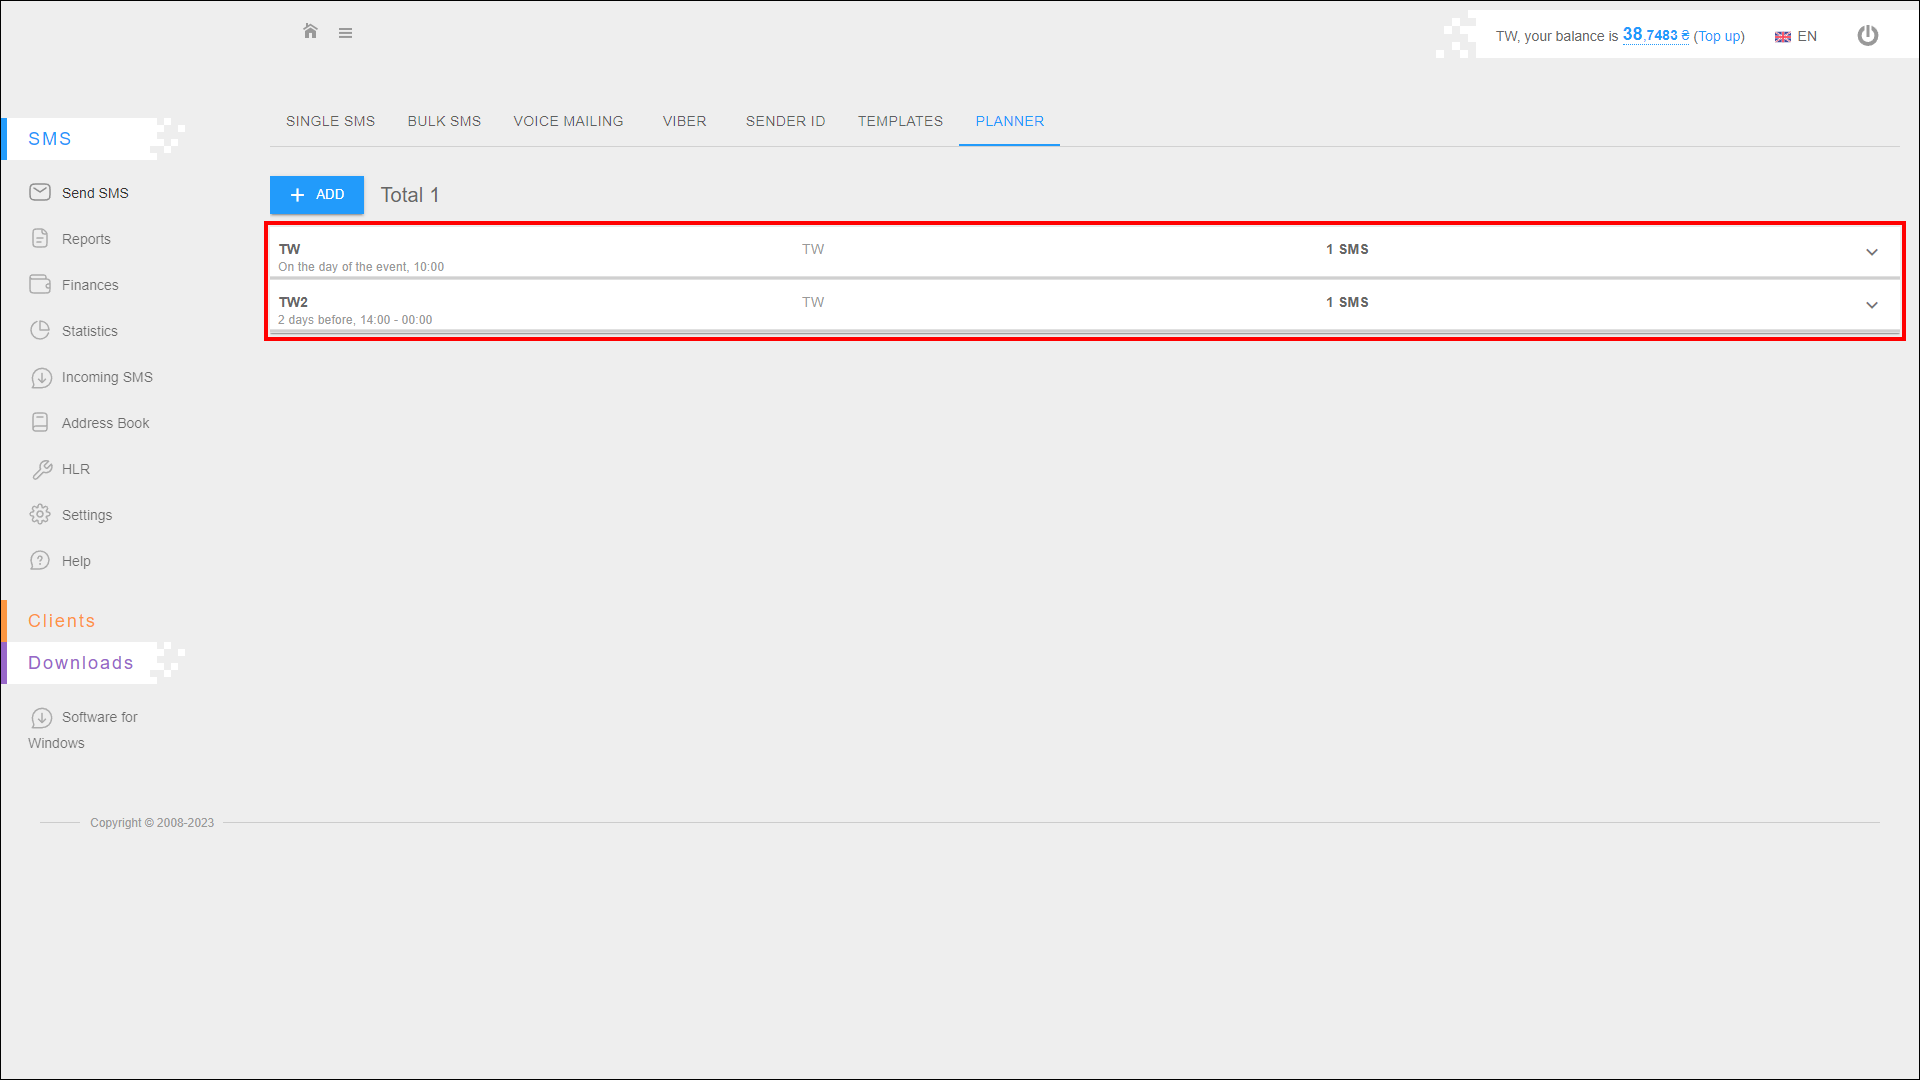
Click on the mailing to view the text of the message.
Additional actions with planned mailing
On the right side of the message text line there is a menu of additional actions:
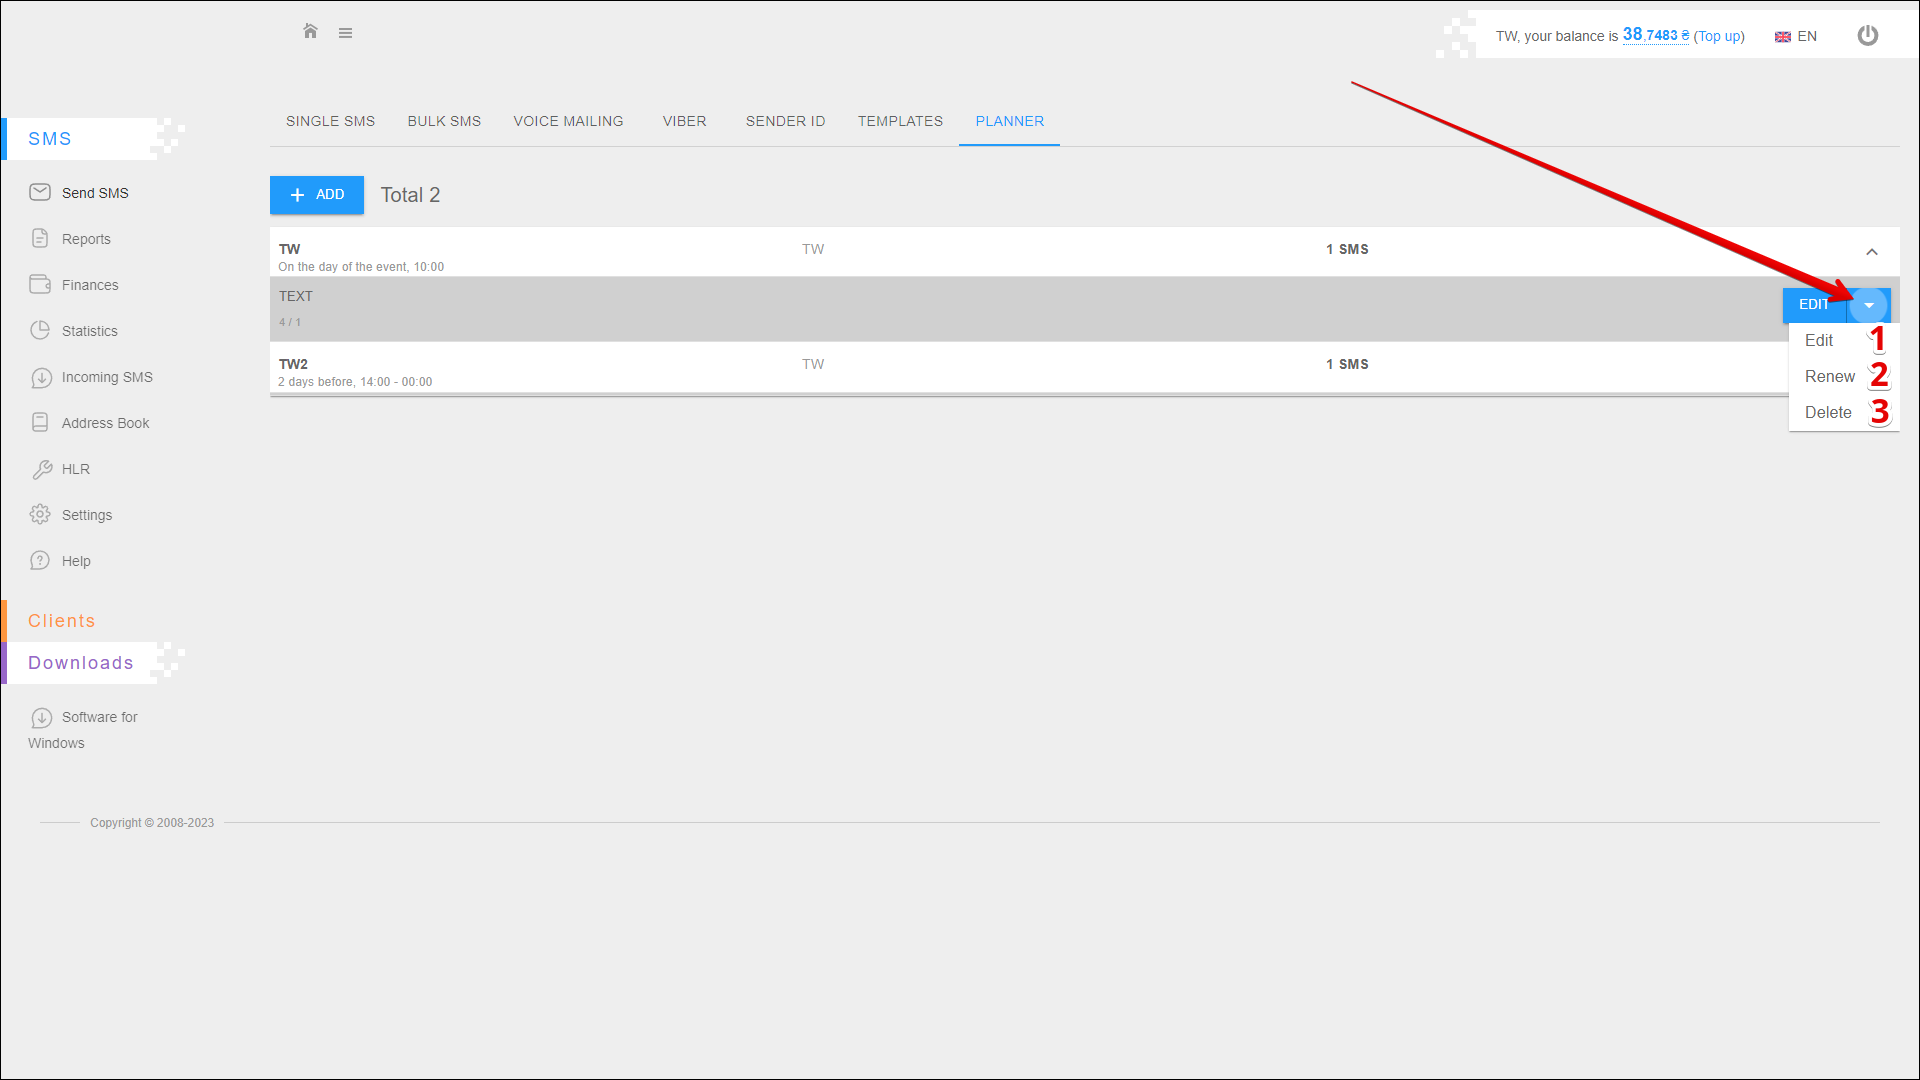
| № | Action | Description |
|---|---|---|
| 1 | Edit | Change planned mailing parameters (further actions are similar to Adding a planned mailing) |
| 2 | Renew | Resume suspended mailings |
| 3 | Delete | Delete planned mailing |